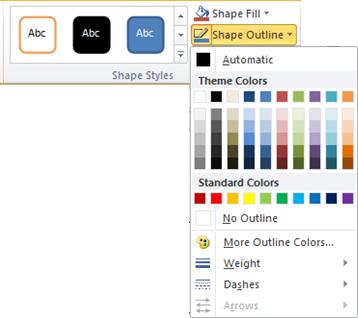
Shape Outline lets you choose the color, thickness, or style of the outside border of a text box, shape, or SmartArt graphic. By setting the border to No Outline, you remove the border altogether.
Important: In Word and Outlook: Before multi-selecting a group of objects, the Wrap Text anchoring option for each object must be something other than In line with Text. For each object, right click it, select Wrap Text, then select an option.
Note: If you're changing the border of a SmartArt graphic, select the graphic, select the Format tab, then select Shape Outline.
Set the line thickness
-
Select the text box or shape border.
If you want to change multiple text boxes or shapes, click the first text box or shape, and then press and hold Ctrl while you click the other text boxes or shapes.
-
Go to Format > Shape Outline, point to Weight, and then choose a thickness.
If you don't see the Format tab, make sure you've selected the text box or shape.
Note: If you don't see the thickness you want, select More Lines, and set the thickness you want in the Width box.
Make a dashed-line border
-
Select the text box or shape.
If you want to change multiple text boxes or shapes, click the first text box or shape, and then press and hold Ctrl while you click the other text boxes or shapes.
-
Click the Format tab, click Shape Outline, point to Dashes, and then click the style you want.
If you don't see Format tab, make sure you've selected the text box or shape.
Use a custom line style
-
Select the text box or shape.
-
On the Format tab, click Shape Outline, point to Dashes, and then select More Lines.
-
In the Format Shape pane, under Line, select the line style options that you want.
Remove the border
-
Select the text box or shape.
If you want to change multiple text boxes or shapes, click the first text box or shape, and then press and hold Ctrl while you click the other text boxes or shapes.
-
On the Format tab, click Shape Outline, and then click No Outline.
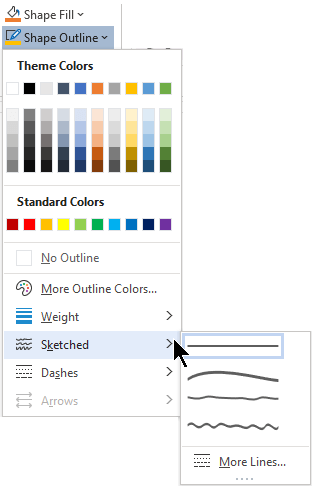
Try the "sketched" outline
If you're using Microsoft 365, you can give a casual, hand-drawn look to shapes with the Sketched outline.
-
Select an existing shape in your document, or draw a new one.
-
With the shape selected, on the Shape Format tab, select Shape Outline > Sketched, and then select a line width.
(The smaller the point size ("pt"), the thinner the line is.)
See also
Add, change, or delete borders from documents or pictures