
Insert clip art
STEP 1:
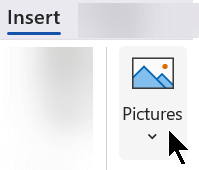
Select Insert > Pictures > Online Pictures
(In Outlook, when you're using the Reading pane, there isn't an Insert menu. Click Pop Out 
STEP 2:
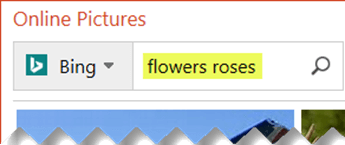
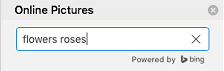
Type a word or phrase to describe what you're looking for, then press Enter.
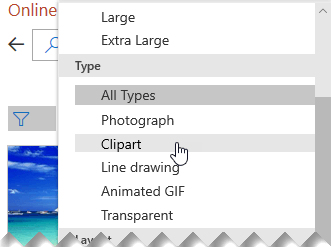
STEP 3:
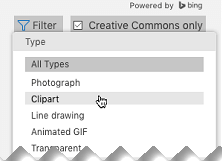
Filter the results by Type for Clipart.

STEP 4:
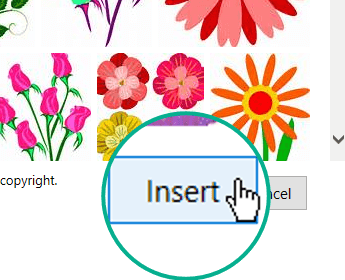
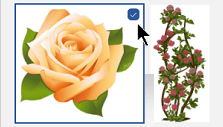
Select a picture.

STEP 5:
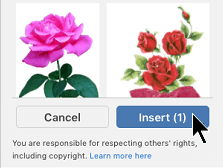
Select Insert.
That's it!
The image is inserted in your Office document.

Clip art and copyright
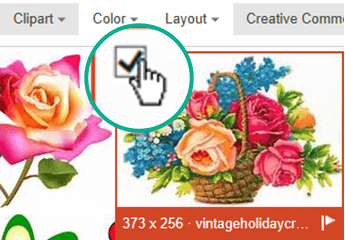
The licensing filter (Creative Commons only or All) can help you choose images that are appropriate for the use you have in mind. (Read about Creative Commons licenses here.)
When using pictures or clip art from Bing, you're responsible for respecting copyright, and the license filter in Bing can help you choose which images to use.
New kinds of clip art for Microsoft 365
Microsoft 365 doesn't have traditional clip art anymore, but as a subscriber you get several new kinds of high quality art in its place for free: high-resolution photographs, icons, cutout people, stickers, illustrations, and cartoon people. Select Insert > Pictures > Stock Images to see your options. For more details, see Insert images, icons, and more.
|
|
Icons are ready-made images that you can insert, pivot, rotate, color, and resize (with no loss of quality). |
 |
Stickers are whimsical illustrations that can enliven any document. |
 |
Cartoon people are cartoon-style drawings. You can mix and match different head/hair, face, and body parts to get just the look you want. |

Voice clips instead of clip art
Looking for information about adding an audio clip to a slide? See Add or delete audio in your PowerPoint presentation.
Insert clip art
STEP 1:
Select Insert > Online Pictures
(In Outlook, when you're using the Reading pane, there isn't an Insert menu. Click Pop Out

STEP 2:
Type a word or phrase to describe what you're looking for, then press Enter.
STEP 3:
Filter the results by Type for Clipart.

STEP 4:
Select a picture.
STEP 5:
Select Insert.
That's it!
The image is inserted in your Office document.
Clip art and copyright
The licensing filter (Creative Commons only or All) can help you choose images that are appropriate for the use you have in mind. (Read about Creative Commons licenses here.)
When using pictures or clip art from Bing, you're responsible for respecting copyright, and the license filter in Bing can help you choose which images to use.
Free image library: the Pickit add-in
Another option is to install an Office add-in named Pickit that puts free, licensed clip art in Office.
Click a section title below to open it and read detailed instructions.
-
Open the Office app you want to add Pickit it to (Word, PowerPoint, or Excel).
-
On the Insert tab, in the Add-ins group, select Store.
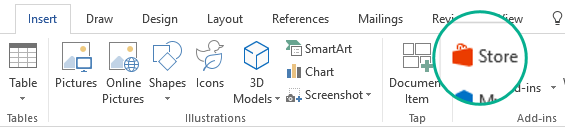
The Office Add-ins dialog box opens.
-
In the dialog box, use the Search box to look for Pickit Free Images.
-
Click the Add button for Pickit Free Images.
-
Close the Office Add-ins dialog box.
Pickit may take a few moments to be "loaded" into the Office app. When it's done, a message appears at the bottom of your app window telling you so.
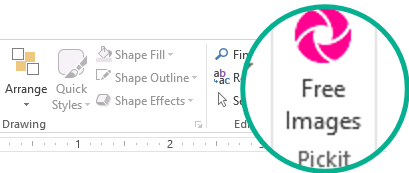
At the far right end of the ribbon, on the Home tab, you'll see the circular pink Pickit icon:
Once Pickit is on your computer, you can find pictures with it as described here:
-
On the Home tab of the Ribbon, in the Pickit section at the far right, select the Free Images button.
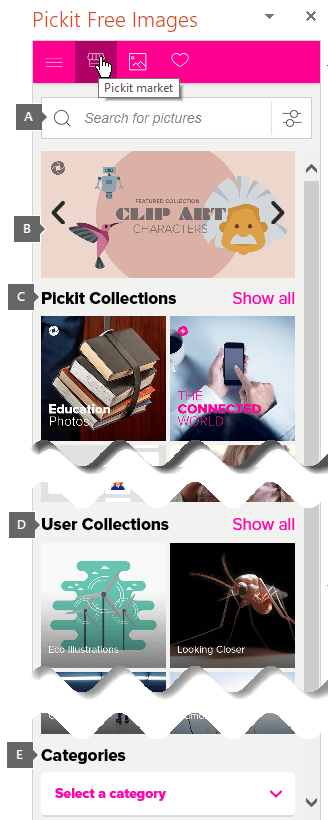
The Pickit Free Images task panel opens on the right side of the application window.
-
On the pink toolbar near the top, use the second tab, the Pickit market, to browse for images.
Pickit lets you browse images in several ways:
-
There's a search box (callout A in the picture) where you can type keywords such as flower, clipart, and business.
-
A set of featured collections (B) just below the Search box. The set includes a Clip Art Characters collection.
-
There are 25 collections (C) organized by Pickit.
-
There are numerous user collections (D) to browse.
-
There are 35 categories (E) of images (such animals and pets, cities and places, music and instruments, and transportation) you can choose from at the bottom of the task panel.
Voice clips instead of clip art
Looking for information about adding an audio clip to a slide? See Add or delete audio in your PowerPoint presentation.
STEP 1:
Select Insert > Pictures > Online Pictures
STEP 2:
Type a word or phrase to describe what you're looking for, then press Enter.
STEP 3:
Filter the results by Type for Clipart.
STEP 4:
Select a picture.
STEP 5:
Select Insert.
That's it!
The image is inserted in your Office document.
The licensing filter (Creative Commons only or All) can help you choose images that are appropriate for the use you have in mind. (Read about Creative Commons licenses here.)
-
Select Insert > Pictures > Stock Images.
Tabs across the top show you the types of pictures you can select from:
-
Images: A large set of high-resolution photographs featuring many different subjects.
-
Cutout People: Photos of people in various poses. The pictures have transparent backgrounds to help them fit easily into your document or to combine multiple pictures.
-
Stickers: Fun, animation-style drawings.
-
Icons (PowerPoint only): Small symbols covering numerous subjects. You can easily change color and resize them with no loss of image quality.
-
Illustrations (PowerPoint only): Many drawings, all in a similar style, covering numerous subjects.
-
Cartoon People (PowerPoint only): A large set of cartoon-style drawings. You can mix and match different parts, such as head/hair and facial expressions.
-
-
Select a tab, then browse the images by scrolling, or enter a term in the search box to filter the set of images.
-
Select an image or images, then choose Insert.
-
Select Insert > Picture > From Online.
-
In the Online Pictures dialog box, type words describing the kind of picture you want (such as roses), and then press Enter.
-
Select the Filter button

-
Select the image you want to insert, then click the Insert button.
(You can only insert one picture at a time.)
The licensing filter (Creative Commons only or All) can help you choose images that are appropriate for the use you have in mind. (Read about Creative Commons licenses here.)
See Also
Insert images, icons, and more in Microsoft 365
Make or find pictures in Office


