If you're trying to schedule a meeting with multiple people or search for a room or other resources for your meeting, the Scheduling Assistant in Outlook on the web can help.
Note: If the instructions don't match what you see, you might be using an older version of Outlook on the web. Try the Instructions for classic Outlook on the web.
Use the scheduling grid
-
At the bottom of the page, select
 to go to Calendar.
 -
At the top of the page, select New event.
-
In the Invite people box, enter the names or email addresses of the people you want to invite.
Select Optional to add optional attendees.
-
On the side of the event form, view your events and other attendees' busy information in day view. Attendee's busy information appears in red on top of your calendar events.
-
Click anywhere on the grid to select a new time for the event.
Use the Scheduling Assistant
The Scheduling Assistant can be used before or after you provide event details. If you provide the date, time, and duration of your event, and add attendees before you open the Scheduling Assistant, those details are carried over and you can change them as needed.
By using the Scheduling Assistant, you immediately get to view the calendar of an attendee and determine their availability—free or busy—for the date and time of the event.
Open the Scheduling Assistant
-
At the bottom of the page, select
to go to Calendar. -
At the top of the page, select New event.
-
At the top of the event form, select Scheduling Assistant.
In the Scheduling Assistant, you can add attendees and a room, and change the date and time of the event, but you can't change the event title.
Add attendees
-
In the Scheduling Assistant, select Add required attendee or Add optional attendee.
-
Type the name or email address of the person you want to add and press Enter.
Add a room
-
In the Scheduling Assistant, select Add a room.
-
Choose a room from the list. You can change buildings by selecting the drop-down menu at the top of the list.
When you select a room list, the Scheduling Assistant will show the conference rooms and their availability.
View calendars
As you add attendees and a location, their calendar information will appear in the calendar grid.
-
Select the date at the top of the Scheduling Assistant to choose a new date for your meeting. In the calendar, select the month or use the up or down arrows to change the month.
-
Select the start time or end time to change when the meeting begins or ends.
-
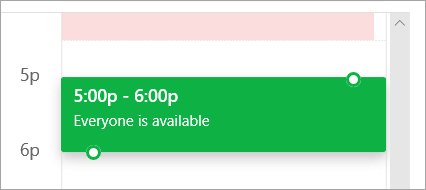
Use the scroll bar at the bottom of the Scheduling Assistant to see attendees' availability before or after the time you've selected.
-
Alternately, you can select a date and time directly on the grid, and resize the selection on the grid to change duration of the event.
Send your meeting invitation
-
Select Done to save your changes and close the Scheduling Assistant.
-
Select Send to send the meeting invitation.