If you have Microsoft 365 or another email service based on Microsoft Exchange Online, use Outlook on the web to share your calendar with people inside or outside your organization. Depending on the permission you give them, they can view your calendar, edit it, or act as your delegate for meeting requests.
Notes:
-
Calendar sharing may not be available for your account, or may be limited to people in your organization, depending on your organization settings.
-
For Outlook.com, see Share your calendar in Outlook.com.
Note: If the instructions don't match what you see, you might be using an older version of Outlook on the web. Try the Instructions for classic Outlook on the web.
Share your calendar
-
At the bottom of the page, select
 to go to Calendar.
 -
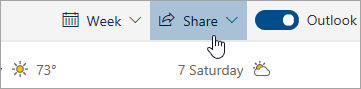
In Calendar, on the toolbar at the top of the page, select Share, and choose the calendar you want to share.
Note: You can't share calendars owned by other people.
-
Enter the name or email address of the person you want to share your calendar with.
-
Choose how you want the person to use your calendar:
-
Can view when I'm busy lets them see when you're busy but doesn't include details like the event location.
-
Can view titles and locations lets them see when you're busy, as well as the title and location of events.
-
Can view all details lets them see all the details of your events.
-
Can edit lets them edit your calendar.
-
Delegate lets them edit your calendar and share it with others.
-
-
Select Share. If you decide not to share your calendar right now, select
 .
.Notes:
-
When sharing your calendar with someone who's not using Outlook on the web, for example, someone using Gmail, they'll only be able to accept the invitation using a Microsoft 365 or an Outlook.com account.
-
ICS calendars are read-only, so even if you grant edit access to other people, they won't be able to edit your calendar.
-
How often your ICS calendar syncs depends on the email provider of the person you've shared it with.
-
Calendar items marked private are protected. Most people you share your calendar with see only the time of items marked private, not the title, location, or other details. Recurring series marked as private will also show the recurrence pattern.
-
Change calendar sharing permissions
You can change the permissions you’ve set for a calendar, or stop sharing the calendar completely, by right-clicking the calendar name under Calendars.
-
At the bottom of the page, select
to go to Calendar. -
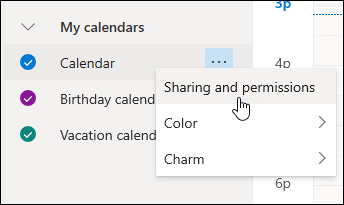
Under Calendars, right-click the calendar you want to update sharing settings for and select Sharing and permissions.
-
Find the person whose permissions you want to change and either choose a new level of permissions or select
to stop sharing your calendar with them.
Add another person’s calendar to your calendar view
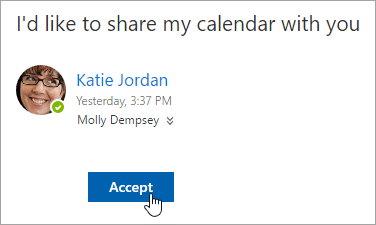
If you receive an invitation to share someone else’s calendar, select Accept at the bottom of the message to add their calendar to your calendar view.
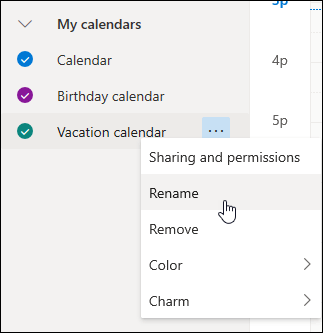
After you add another calendar, you can rename it, change its color, or remove it from your view. To do this, right-click the calendar in the navigation pane.
Stop sharing your calendar with someone
If you want to stop sharing your calendar with someone, you can remove their permissions.
-
At the bottom of the page, select
to go to Calendar. -
In the left pane, right-click the calendar you want to stop sharing and select Sharing and permissions.

By default, your primary calendar is called "Calendar". If you created other calendars, you can select one of them instead. You can't remove sharing permissions from calendars owned by other people.
-
Choose the person you want to stop sharing your calendar with and select
.The person is now removed from the list of people who have access to your calendar. Their copy of your calendar will no longer sync to your calendar or receive updates.
Publish your calendar
In Calendar settings, you can publish your calendar so anyone can view your calendar or subscribe to it.
-
In Calendar view, select Settings
 .
. -
Select Shared calendars.
-
Under Publish a calendar, choose which calendar you want to publish and how much detail people can see.
-
Select Publish.
-
If you choose an HTML link, recipients can copy and paste the URL in a browser to view your calendar in a new browser window.
If you choose an ICS link, recipients can download the ICS file and import it into Outlook. This will add your events into their calendar, but recipients won't automatically receive any updates to your calendar. Alternatively, recipients can use the ICS link to subscribe to your calendar through Outlook. They'll see your calendar alongside their own and will automatically receive any updates to your calendar.
Notes:
-
HTML and ICS calendars are read-only, so recipients won't be able to edit your calendar.
-
How often your ICS calendar syncs depends on the recipient's email provider.
Unpublish your calendar
-
In Calendar view, select Settings
. -
Select Shared calendars.
-
Under Publish a calendar, select Unpublish.
Additional information to provide to recipients
After sharing your calendar, have recipients review the following information about opening shared calendars.
To open a calendar in a Microsoft 365, Exchange Online environment, see How to enable and disable the Outlook calendar sharing updates. Otherwise, if you are using Exchange On-Premises or other email accounts such as Outlook.com, see the following articles as applicable:
-
Outlook for Windows: Open another person's Exchange Calendar
-
Outlook on the Web: Manage someone else's calendar in Outlook on the web
-
Outlook for Mac: Open a shared Exchange calendar in Outlook for Mac
-
Outlook for Mobile: How do I open a shared calendar?
-
Outlook.com: Share your calendar in Outlook.com