You may want to share specific files or folders with people who don't otherwise have access to the site. When you share files and folders, you can decide whether to let people edit or just view them.
Notes:
-
To share OneDrive files and folders, check out Share OneDrive files and folders.
-
You can also share the entire site.
-
Your sharing experience may look slightly different than the steps and screenshots below, but the information will still help you share files and folders.
-
File or folder sharing from modern experience breaks the inheritance at the list/library level.
Share a file or folder
-
Select the file or folder you want to share.
-
On the command bar above the list, select Share.
The Share link window opens. In this window, you specify (A)your recipients and (B) their permissions in relation to the file or folder, then (C) send the info:
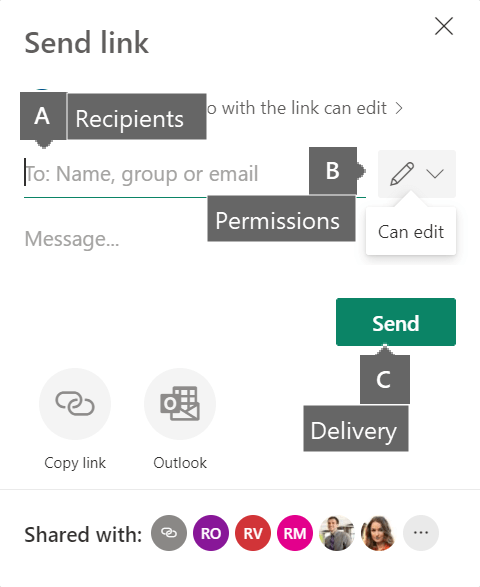
A: Recipients
Select the To line, then enter the names of anyone you want to share with.
Have something to say? Select Message... and type a note.
B: Permissions
The pen symbol indicates that the recipients can edit the file:
If you want to change that, select the pen and then switch so that recipients can view the file:


C: Delivery
Select Send.
An email message (which includes a link to the file) is sent to each recipient.